US Geek DIY Projects: Build a Lightsaber for Under $50 in 2025
In 2025, US geeks can embark on exciting DIY projects, including building a custom lightsaber for under $50 by utilizing affordable materials, basic electronics, and creative upcycling techniques.
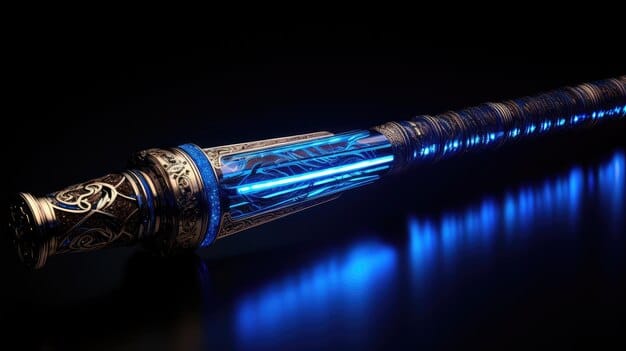
Dreaming of wielding your own lightsaber? In 2025, US Geek DIY Projects: Build a Custom Lightsaber for Under $50 in 2025 will become easier and more affordable than ever, allowing you to craft your own iconic weapon without breaking the bank.
Embarking on Your Lightsaber Journey: An Overview
Creating your own lightsaber is a rewarding DIY project that combines creativity, technical skills, and a love for the Star Wars universe. This overview sets the stage for your building adventure.
In this guide, we’ll explore how to construct a custom lightsaber in the US for under $50, focusing on readily available materials and cost-effective techniques suitable for geeks and DIY enthusiasts. We’ll walk through each step, providing tips and insights for a satisfying and budget-friendly build.
Understanding the Basics of Lightsaber Construction
Before diving into the project, it’s helpful to understand the core components of a lightsaber. This knowledge will guide your material choices and assembly process.
- Hilt: The handle of the lightsaber, typically made of metal or durable plastic.
- Blade: The illuminated part of the lightsaber, usually made from a polycarbonate tube with LED lighting.
- Electronics: Includes the LED, battery, switch, and optional soundboard for realistic effects.
- Power Source: Typically, rechargeable batteries provide the necessary power for the LED and sound effects.
Keep these basics in mind as you plan your budget and gather materials. The goal is to balance cost-effectiveness with achieving a visually appealing and functional lightsaber.

Sourcing Budget-Friendly Materials in 2025
The key to building a lightsaber for under $50 is to find affordable and readily available materials. This section outlines where to source these items and offers some cost-saving tips.
Scouring local hardware stores, online retailers, and even recycling centers can yield the necessary components without overspending.
Economical Options for Hilt Components
The hilt is a crucial part of the lightsaber, both aesthetically and functionally. Thankfully, there are numerous affordable materials you can use to create a convincing hilt.
- PVC Pipes: A common and inexpensive material for the hilt’s body.
- Metal Tubes: Aluminum or steel tubes can add durability and a premium feel while remaining cost-effective.
- Recycled Materials: Upcycle items like flashlight casings, plumbing fixtures, or even discarded toys for unique hilt designs.
Affordable Blade and Lighting Solutions
The blade and lighting are essential for giving your lightsaber its iconic glow. Here are some budget-friendly options to consider for 2025.
- Polycarbonate Tubing: Durable and can diffuse light evenly, creating a vibrant blade effect.
- LED Strips: Use energy-efficient LED strips for illumination instead of a single high-powered LED.
- Diffusers: Add diffusion film or wrapping paper inside the blade to spread the light and eliminate hotspots.
Remember to compare prices and look for discounts when sourcing your components. With some resourcefulness, you can assemble a complete lightsaber kit without exceeding your budget.
Step-by-Step Guide to Lightsaber Assembly
Now that you’ve gathered your materials, it’s time to begin the assembly process. These detailed instructions will guide you through each step of building your lightsaber.
Follow these steps carefully, and feel free to customize your design as you go. Safety is paramount, so always wear protective gear when cutting or assembling components.
Constructing the Hilt
The hilt can be customized with different designs and ergonomic grips. Follow these steps to build a sturdy and stylish hilt.
- Cut the PVC or metal pipe to your desired hilt length using a saw or pipe cutter.
- Sand the edges to remove any burrs and create a smooth surface.
- Attach additional components: Add grips, buttons, and aesthetic details using adhesive or screws.
Assembling the Blade and Lighting
The blade is where the magic happens, and this section will show you how to light it up. Ensure that you properly insert the lighting components into your blade.
- Insert the LED strip: Carefully slide the LED strip into the polycarbonate tube.
- Add diffusion: Wrap the LED strip with diffusion film or paper to spread the light evenly.
- Seal the blade: Secure the blade to the hilt using a compatible fitting or adhesive.
Test the lighting before fully assembling the blade to ensure everything is working properly. At this point, adjustments are best made before the project is completed.
Electronics and Powering Your Saber
Bringing your lightsaber to life requires the right electronic components and a reliable power source. This section details how to integrate the electronics and supply power to your lightsaber.
From wiring the LED to installing a switch and adding sound effects, we’ll cover the essentials for creating a functional lightsaber.
Wiring the LED and Switch
Correctly wiring the LED and switch is crucial for controlling your lightsaber. Here’s what you need to know about connecting the components.
- Connect the LED: Solder the LED to the appropriate wires, ensuring correct polarity (positive and negative).
- Install the switch: Wire the switch in series with the LED and power source to control the light.
- Test the circuit: Use a multimeter to check for any shorts or issues before connecting the power source.
Adding Sound Effects (Optional)
For a more immersive experience, consider adding sound effects to your lightsaber. This involves including a soundboard and speaker in your build.
- Soundboard: Choose a compact soundboard that offers various sound effects and easy integration.
- Speaker Placement: Mount the speaker inside the hilt, ensuring it doesn’t interfere with other components.
- Wiring the Soundboard: Connect the soundboard to the switch and speaker, following the manufacturer’s instructions.
With these steps, you’ll have a lightsaber that not only looks great but also sounds authentic. The integration of electronics is key to creating a dynamic and realistic saber experience.
Customization and Finishing Touches
Now that the core elements of your lightsaber are assembled, it’s time to add your personal touch. Customization is where you can let your creativity shine and make your lightsaber truly unique.
From decorative wraps to battle-worn finishes, there are countless ways to enhance the appearance and feel of your lightsaber.
Decorative Grips and Wraps
Enhance the hilt’s grip and aesthetics with stylish wraps. Some popular options include:
- Leather Wraps: Adds a classic, comfortable grip with a rustic look.
- Rubber Grips: Improves handling and provides a secure hold during duels.
- Cloth Wraps: Available in various colors and patterns to match your personal style.
Battle-Worn Finishes and Weathering
Give your lightsaber a realistic, battle-hardened appearance by adding weathering effects. Techniques include:
- Sandpapering: Gently sand edges and surfaces to simulate wear and tear.
- Acrylic Paints: Apply layers of paint to create color variations and depth.
- Dry Brushing: Use a dry brush to add subtle highlights and shadow to the hilt.
Experiment with different techniques to achieve a look that reflects your character’s history and battle experience. No two lightsabers should look the same.
Ensuring Safety and Responsible Usage
While building and wielding a lightsaber is fun, safety should always be a top priority. This section outlines essential safety precautions and guidelines for responsible usage.
Knowing how to handle your lightsaber safely will prevent accidents and ensure that you, and those around you, have an enjoyable experience using your creation.
Safety Precautions During Construction
When building your lightsaber, adhere to these safety measures:
- Wear Protective Gear: Always wear safety glasses and gloves when cutting, sanding, or soldering components.
- Work in a Well-Ventilated Area: Ensure proper ventilation when working with adhesives or paints.
- Supervise Children: If children are involved, provide close supervision and guidance.
Responsible Usage Guidelines
Once your lightsaber is complete, follow these guidelines for responsible usage:
- Avoid Pointing at People: Never point the lightsaber at anyone’s face or eyes.
- Indoor and Outdoor Use: Be aware of your surroundings and potential hazards.
- Storage: Store the lightsaber in a safe place, away from children and pets.
By following these guidelines, you can enjoy your lightsaber responsibly and safely. The responsible use of your lightsaber will also enhance the experience of those around you.
| Key Point | Brief Description |
|---|---|
| 💡 Budget Materials | Use PVC pipes, LED strips, and recycled items to keep costs under $50. |
| 🛠️ Step-by-Step Assembly | Construct your hilt, assemble the blade, and integrate the lighting with detailed instructions. |
| ⚡ Electronics Integration | Wire the LED and switch, and optionally add sound effects for a more authentic experience. |
| 🛡️ Safety | Adhere to strict safety precautions during construction and responsible usage guidelines. |
FAQ
▼
PVC pipes and reused metal tubes are excellent options, that provide sturdiness while maintaining a cost-effective build.
▼
Solder the LED and switches after insuring about their polarity and wearing protective gear working in ventilated areas.
▼
Experiment with leather wraps, rubber grips, or battle-worn finishes using acrylic paints and sandpapering techniques, according to your style.
▼
Avoid pointing at anyone, supervise children, and be aware of surroundings when used indoors/outdoors, helping prevent future accidents.
▼
Energy-efficient LED strips provide bright, even illumination and diffuse the light evenly across the polycarbonate tube, creating vibrant color.
Conclusion
Building a custom lightsaber for under $50 in 2025 is an achievable and rewarding project for US geeks and DIY enthusiasts. By sourcing budget-friendly materials, following step-by-step assembly instructions, and prioritizing safety, you can create a unique and iconic Star Wars weapon that reflects your personal style and creativity. With a little ingenuity and resourcefulness, your lightsaber dreams can become a reality without breaking the bank. May the Force be with you!


