US Cosplay Photography: 7 Budget-Friendly Photography Secrets

US Cosplay Photography Secrets: 7 Tips for Stunning Shots on a Budget offers practical advice for capturing amazing cosplay photos without breaking the bank, covering everything from location scouting and lighting techniques to posing tips and post-processing tricks, perfect for photographers and cosplayers alike.
Want to capture stunning cosplay photos in the US without emptying your wallet? The world of cosplay is vibrant, creative, and often expensive. But don’t let budget constraints stop you from memorializing your hard work and incredible costumes. This guide divulges US Cosplay Photography Secrets: 7 Tips for Stunning Shots on a Budget, helping you create amazing images that showcase your cosplay artistry.
US Cosplay Photography on a Shoestring
Cosplay, a portmanteau of “costume play,” is a performance art where participants don elaborate costumes to represent specific characters. Photography immortalizes these creations, but professional shoots can be costly. Fortunately, amazing cosplay photography doesn’t require a huge investment. With a few clever strategies, you can achieve professional-looking results.
Embrace Natural Light
The best light is often free. Utilize natural light whenever possible. Overcast days provide a soft, diffused light, ideal for avoiding harsh shadows. Golden hour (the hour after sunrise and the hour before sunset) offers a warm, magical glow.
Location, Location, Location
Scout locations beforehand. Parks, urban landscapes, and even your own backyard can serve as excellent backdrops. Look for places that complement the character’s aesthetic. A fantasy character might look stunning in a wooded area, while a cyberpunk character might thrive against a cityscape.
- Parks offer natural beauty and diverse settings.
- Urban environments provide edgy and modern backdrops.
- Historical sites evoke a sense of time and place.
- Even indoor locations, like museums or libraries (with permission), can offer unique opportunities.
Consider the character’s story and choose a location that enhances their persona. A weathered prop or costume deserves a setting with character.
Mastering Composition Basics
Composition is how you arrange elements within your frame. It’s a crucial aspect of photography that guides the viewer’s eye and tells a story. Even with a budget-friendly setup, strong composition can elevate your cosplay photography.
The Rule of Thirds
Imagine your frame divided into nine equal parts by two horizontal and two vertical lines. Placing key elements along these lines or at their intersections creates a balanced and visually appealing image.
Leading Lines
Use lines (roads, fences, rivers) to draw the viewer’s eye into the scene and towards the subject. Leading lines add depth and dimension to your photos.
Framing
Use elements in the foreground to frame the subject. This could be trees, archways, or even blurred objects. Framing adds context and draws attention to the cosplay.
Experiment with different angles and perspectives. Get low to the ground for a heroic perspective, or shoot from above for a more intimate feel. Don’t be afraid to break the rules, but understand them first.
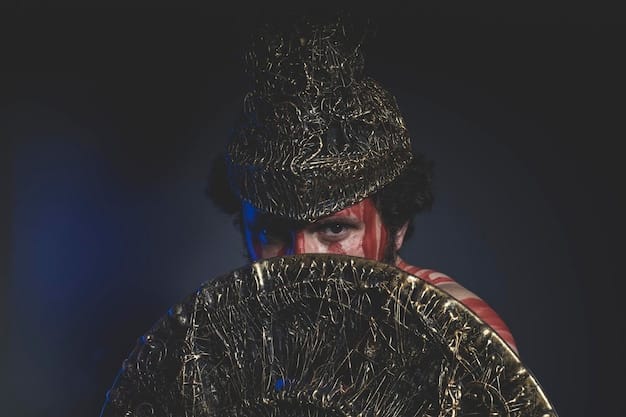
Posing and Expression: Bringing the Character to Life
Posing and expression are critical for conveying the character’s personality and story. A well-executed pose can transform a good cosplay photo into an exceptional one. Direct your cosplayer to embody the character, not just wear the costume.
Research Character Poses
Study reference images of the character. Pay attention to their signature poses, expressions, and body language. Mimic these elements to create authentic and recognizable photos.
Communicate Clearly
Provide clear and concise instructions to the cosplayer. Guide them through the poses, offering suggestions for improvement. Don’t be afraid to demonstrate poses yourself to help them understand what you’re looking for.
Capture Candid Moments
While posed shots are important, don’t forget to capture candid moments. These spontaneous moments often reveal the character’s true personality and create more natural and engaging photos.

Encourage the cosplayer to experiment with different expressions and emotions. A simple change in facial expression can drastically alter the mood of the photo.
Lighting on a Dime: Affordable Solutions
Good lighting is essential for any photograph. While professional lighting equipment can be expensive, there are affordable alternatives that can significantly improve your cosplay photography.
Reflectors
Reflectors are inexpensive and versatile tools for bouncing light. They can be used to fill in shadows, add highlights, and create a more even lighting. A simple white foam board can even work in a pinch.
DIY Diffusers
Diffusers soften harsh light, creating a more flattering effect. You can make your own diffuser using a sheer curtain or a piece of tracing paper.
- Purchase a foldable reflector for easy portability.
- Experiment with different reflector surfaces (white, silver, gold) to achieve varying effects.
- Use a diffuser to soften harsh sunlight and reduce shadows.
- Position your light source strategically to create the desired mood and atmosphere.
Remember to position your lighting carefully. Consider the direction of the light, its intensity, and its color temperature. Experiment with different setups to find what works best for your subject and environment.
Lens Choices: Finding the Right Perspective
Lenses have a significant impact on the look and feel of your photographs. Different focal lengths create different perspectives, affecting depth of field, compression, and overall composition. Choosing the right lens can enhance your cosplay photography.
Prime Lenses
Prime lenses (lenses with a fixed focal length) are often sharper and have wider apertures (lower f-numbers) than zoom lenses. A 50mm prime lens is a versatile and affordable option for cosplay photography.
Zoom Lenses
Zoom lenses offer more flexibility in terms of focal length. They allow you to zoom in or out without physically moving, which can be useful in tight spaces or when shooting from a distance.
Consider renting lenses before you buy them. This allows you to experiment with different focal lengths and see what works best for your style. A wide-angle can capture epic landscapes, while a telephoto can isolate your subject with a blurred background.
Post-Processing: Enhancing Your Images
Post-processing is the process of editing your photos after they’ve been taken. It can be used to correct exposure, adjust colors, remove blemishes, and add creative effects. Even basic post-processing can significantly improve your cosplay photos.
Free Editing Software
There are many free photo editing software options available, such as GIMP and Darktable. These programs offer a wide range of features, including color correction, sharpening, and noise reduction.
Mobile Editing Apps
Mobile editing apps like Snapseed and VSCO are convenient for making quick edits on your phone or tablet. They offer a user-friendly interface and a variety of filters and presets.
Learn the basics of color correction, sharpening, and noise reduction. These techniques can significantly improve the quality of your photos. Don’t overdo it with the effects; subtle adjustments are often more effective.
Leveraging Social Media and Building Your Portfolio
Social media is a powerful tool for sharing your cosplay photography and building your portfolio. Platforms like Instagram, Facebook, and Twitter allow you to showcase your work to a wide audience and connect with other cosplayers and photographers.
- Create a dedicated Instagram account for your cosplay photography.
- Use relevant hashtags to increase visibility.
- Engage with other cosplayers and photographers.
- Share your work on Facebook groups and cosplay forums.
Building a strong portfolio is essential for attracting clients and collaborators. Showcase your best work in a variety of styles and settings. Update your portfolio regularly with your latest and greatest photos. You can create a website or use platforms like Behance or Flickr to host your portfolio.
| Key Point | Brief Description |
|---|---|
| 💡 Natural Light | Utilize free natural light for soft, flattering results. |
| 📸 Composition | Apply the rule of thirds and leading lines for visual appeal. |
| 🎭 Posing | Research character poses and communicate clearly. |
| 💰 Budget Solutions | Use reflectors and DIY diffusers for affordable lighting. |
Frequently Asked Questions
▼
Reflectors and DIY diffusers are great budget-friendly choices. Reflectors bounce light to fill shadows, and diffusers soften harsh light, creating flattering effects.
▼
Utilize local parks, urban environments, and even your own backyard. Scout locations in advance to ensure they match the character’s aesthetics and story.
▼
Research the character’s signature poses and expressions. Communicate clearly with the cosplayer and capture both posed and candid moments for a natural feel.
▼
Free options like GIMP and Darktable offer a wide range of features. Mobile apps such as Snapseed and VSCO are great for quick edits on your phone or tablet.
▼
Create a dedicated Instagram account, use relevant hashtags, and engage with other cosplayers. Showcase your best work on platforms like Behance or Flickr.
Conclusion
Mastering US Cosplay Photography Secrets: 7 Tips for Stunning Shots on a Budget allows anyone to capture incredible images. By focusing on budget-friendly techniques like utilizing natural light, mastering composition, and exploring free editing software, one can transform ordinary cosplay photos into extraordinary works of art. The key is to practice, experiment, and never stop learning.


